I've been off on vacation for the past two weeks (it's been fabulous!) and had time to work on a few fun little projects. One thing I've been wanting to do is to try to replicate these very cute Orla Kiely zipper pouches I recently bought at Target.

For some reason, I really like the way the zipper curves down on one side of the pouch. It's a unique detail, and makes these pouches a little different from your standard zipper pouch. I decided to try to replicate the various sizes and curved zippers, and as I was posting pictures of my progress on Instagram (I'm @JenniferLGB over there), a few people expressed interest in a tutorial, so here we are!
I'm going to give measurements for all three sizes of pouch (small, medium, large). These are pretty darn close to the sizes of the original pouches. Other than the measurements, the instructions are the same for each size of pouch.
On any of the photos below, you can click on them to go to Flickr and see them in a larger size if you'd like to see in more detail or check something out close up.
Curved Zipper Pouch Tutorial
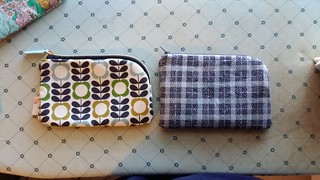
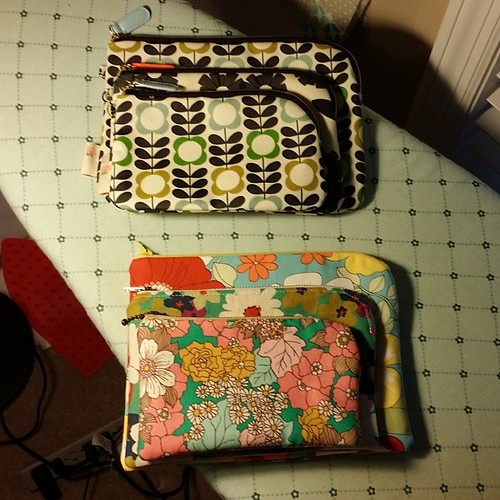
Use a 1/4" seam throughout unless otherwise indicated. Please read through all the instructions before starting, as there are several options at different steps and you may want to plan out ahead of time which options you'll use.
Approximate finished sizes:
- Small -- 4.5" x 7.5"
- Medium -- 5.5" x 8.5"
- Large -- 7" x 9.5"
Supplies needed for small, (medium, large) pouch
- 1 fat quarter exterior fabric or scrap at least 12"x12" (13"x14", 14"x17")
- 1 fat quarter lining fabric or scrap at least 10"x12" (11"x14", 12"x17")
- Fusible interfacing at least 10"x12" (11"x14", 12"x17") I used Pellon Fusible Fleece or SF101, but any kind of fusible in your preferred weight will work. In the sample here I used Fusible Fleece, and I prefer the feel and weight of Fusible Fleece if using quilting cotton for the exterior. If using a heavier weight fabric for the exterior, such as home decor weight or a cotton/linen blend, the SF101 is probably sufficient.
- 8" (9", 10") zipper (or longer, cut down to size)
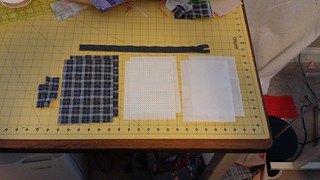
Cutting instructions for small (medium, large) pouch
From exterior fabric
(2) 5" x 8" (6" x 9", 7.5" x 10") for exterior of pouch
(2) 1.5" x 3" for zipper tabs (for all sizes)
From lining fabric
(2) 4.75" x 8" (5.75" x 9", 7.25" x 10") for lining of pouch
Note that these are cut 0.25" shorter than the exterior fabric. That is so the lining fits more snugly in the bag. If you don't care if there is a little bit of bunching at the bottom of your bag, you can cut your lining pieces to the same exact size as the exterior pieces (especially if you want to save time and rotary
cut all four pieces at once)
From fusible interfacing
(2) 5" x 8" (6" x 9", 7.5" x 10")
Instructions
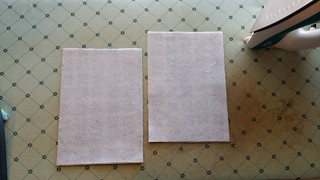
First, fuse fusible interfacing to exterior pouch pieces. If you prefer, you can fuse your interfacing to your exterior fabric prior to cutting.
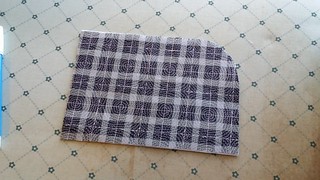
Next, we're going to create the rounded corner for the curved zipper.
Place your two exterior fabric pieces wrong sides together. Do the same for your two lining pieces. Lay these pieces on your cutting board, with the longer direction of the fabric horizontal. Remember, your pouch will be longer than it is tall.
Find something round (a cup or lid or spool of ribbon, really anything will work) and place it on the top right corner of the fabric pieces, and trace the curve. This is where you'll cut to make the curved corner.
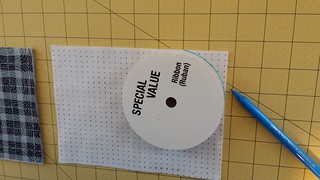
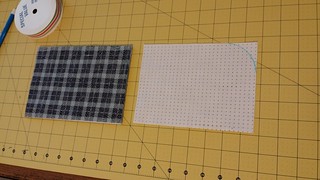
Now, cut the corners of the fabric, creating your curved corners for the zipper. Don't forget that your pieces need to be wrong sides together when you do this, so the opposite corner will be cut on the front and back pieces!
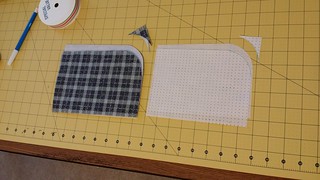
Set the exterior and lining pieces aside for a moment. Next, we're going to prepare the zipper.
If your zipper is longer than is needed for the pattern, now is the time to shorten it. With the zipper closed, measure from the end with the zipper pull, measuring 8", 9", or 10", depending on the size pouch you're making. These lengths will result in a zipper that curves down about 1/3 the side of the pouch. If you want your zipper to go father down the side of your pouch, you can use a longer length than what I've given above, but I wouldn't go more than 1-1.5" longer, as it will make the pouch more difficult to make.
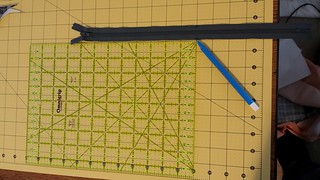
Using a pen, make a mark on the zipper at the appropriate length. Take the zipper to your sewing machine, and stitch across the zipper at the point you marked, backstitching and restitching across the zipper several times.
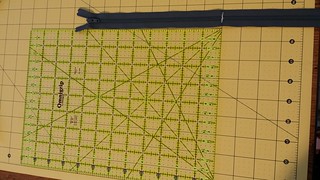
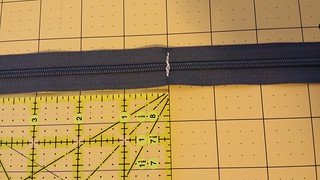
Measure 0.75" from the stitching line, and cut the excess zipper off.
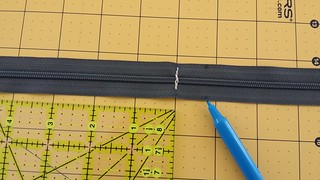
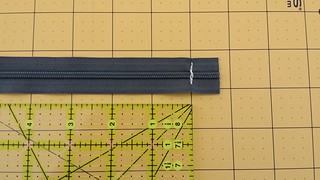
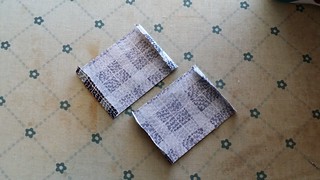
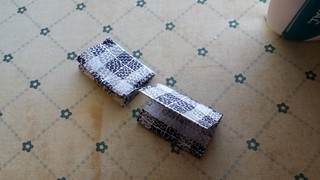
Next we need to attach the zipper tabs. Take your two 1.5"x 3" pieces of fabric. Fold over each short end of the fabric 1/4" and press.
Now fold in half and press again, then insert zipper in between, centering the zipper in the fabric. Make sure you insert the zipper far enough that when you close the tab, it will cover your stitching line. On the opposite end with the pull tab, end the zipper tab just outside the metal stops, as shown in the picture below. I've found it helps a bit at this point to put a bit of Elmer's school glue along the 1/4" folded seams, and then press the zipper in between with the iron, glue basting the zipper in between the folds of the fabric.
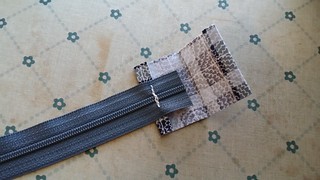
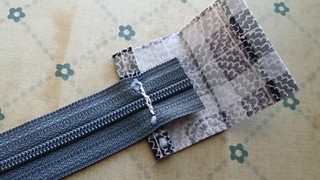
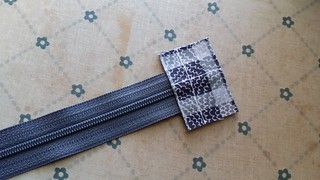
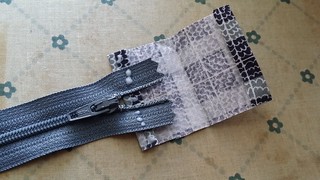
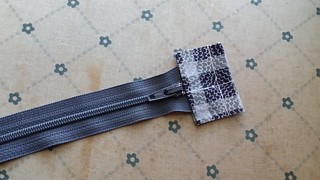
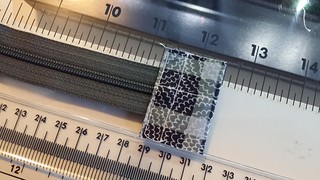
Take the zipper to your machine, and carefully stitch 1/8" away from the top edge of the fabric, close to the zipper, attaching the tab to the zipper. Do this to both ends of your zipper.
Now, grab the exterior piece of fabric that has the curve cut from its top right corner, lay it wrong side down on your ironing board.
Take your zipper and lay it atop your exterior fabric with the zipper pull to the left. About 1/2" of your fabric tab should be sticking out past the edge of your fabric. You want to make sure the metal zipper stops are about 1/2" from the left edge of your fabric.
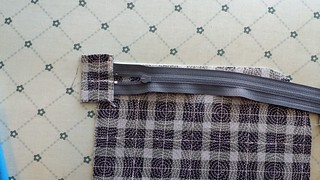
Find the spot on your zipper that lines up with where the curve of your pouch starts, and make a mark on both edges of the zipper.
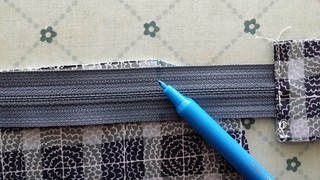
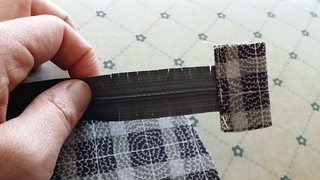
Now, your need to clip your zipper from that point you just marked, to the end of the zipper where your zipper tab begins, to accommodate the curve. Take a sharp pair of scissors and use the tips to gently cut about halfway into the zipper tape. Do this on both sides of the zipper.
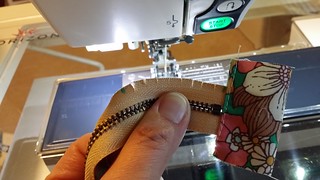
Take your clipped zipper and lay it down again right side down on your exterior fabric, with the zipper pull to the left, metal stops about 1/2" from the edge of the fabric. I find it helpful at this point to glue baste to really hold my zipper in place well. I run a small bead of glue along the flat top edge of my exterior fabric, until you reach the curve. Place the zipper right side down aligned with the top edge of the exterior fabric, zipper pull to the left, and press with your iron along the tape to adhere. If you don't want to glue baste, you can pin the zipper or use Clover binding clips to hold in place.
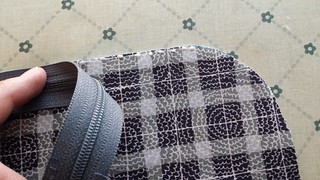
Next, we need to ease the zipper around the curve. I apply more glue around the corner, and then gently press the zipper around the curve, doing my best to evenly stretch around the corner. Press with the iron to adhere (or pin or clip in place).
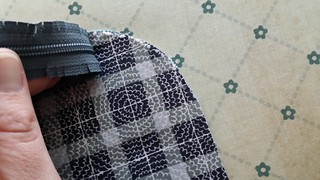
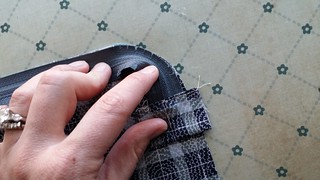
I make sure to glue the zipper all the way to where the fabric tab starts. Also, make sure your tab is perpendicular to the side of your pouch, and then pin the tab about halfway down to hold in place there, and to mark where your stitching will end.
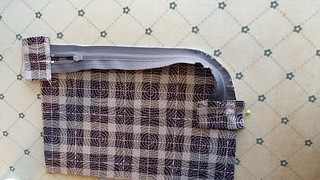
Now, take one of your lining pieces and place it right side down on top of the exterior fabric and zipper. You'll need the lining piece with the curve on the opposite corner, so that it lines up when you place it right side down. Lining wrong side is up!
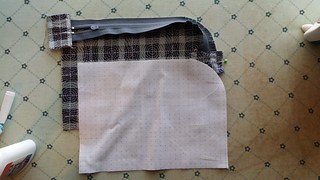
I glue baste again at this point, running a small bead of glue all along the edge of the zipper, then placing the lining right side down and pressing with the iron. This holds very well! You can also pin or clip in place.
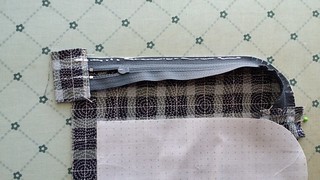
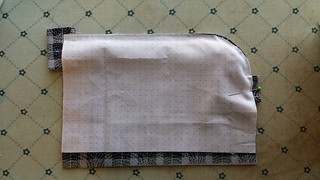
Don't be alarmed that the lining fabric is shorter than your exterior fabric! It's supposed to be, remember? We cut it 1/4" shorter so that your lining won't be bunchy at the bottom of your bag.
Next, it's time to stitch the layers in place. Make sure your zipper is unzipped at least halfway at this point. Using your zipper foot or your walking foot (I highly recommend using the walking foot to sew zippers, it works great!) sew all of the layers with a 1/4" seam. About halfway through the seam, stop and zip your zipper closed enough so it's behind your foot, the continue sewing. When you reach the curve, you'll need to go slowly and carefully to make the corner. You'll also need to do your best to keep the zipper flattened and out of the way as you're sewing around the corner. It may get a little wonky, but try not to worry too much about perfection. Just try to get as smooth of a curve as possible, keeping your seam allowance consistent. Continue your stitching about halfway into the zipper tab, to where you placed your pin, backstitching at the end of your seam.
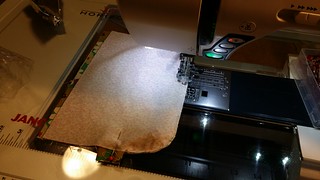
Next, you need to clip your seam allowance around that curve so your fabric will lie nicely once you've turned your fabric. Make sure you only cut about halfway into your seam allowance.
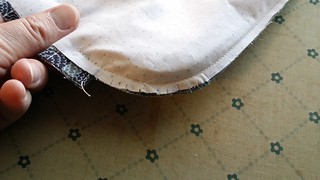
Now, turn your fabrics right side out and press along the zipper. You can top stitch along the zipper if you like, but I don't recommend it. I top stitched one of the samples I made while working up the tutorial, and although the first side of the pouch isn't a problem, once you attach the fabrics to the other side of the zipper, it's nearly impossible to top stitch the second side around the curved edge because of the bulk of the zipper, which has to be closed in order to stitch around that end. So, I don't recommend top stitching on this pouch.
Take your other exterior fabric piece and place it right side up on your ironing board.
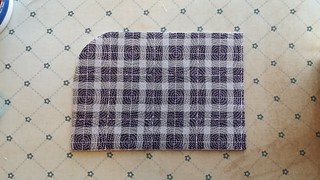
Making sure your zipper is unzipped at least partially (I prefer to unzip all the way), place your zipper right side down on the exterior fabric piece, making sure to line up the edges of the fabric on the side without the curve. Glue baste, pin, or clip in place. Again, make sure that your zipper tab on the curved end of the zipper ends up perpendicular to the side of pouch, and place a pin in it halfway down to hold in place and to mark where your stitching will end.
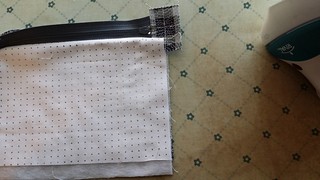
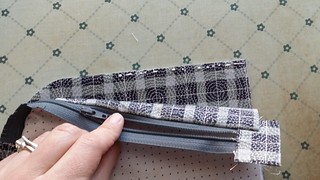
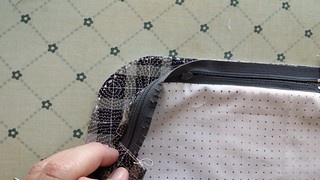
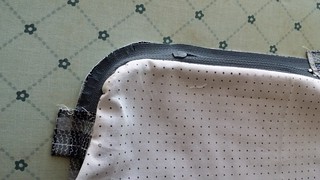
Then, place your other lining fabric piece right side down on top of the zipper and exterior fabric. Glue baste, pin, or clip in place.
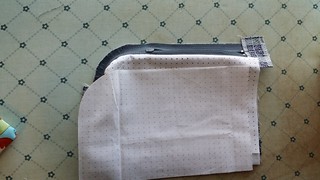
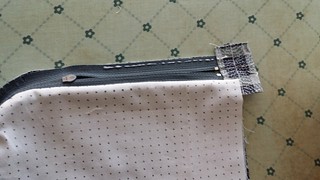
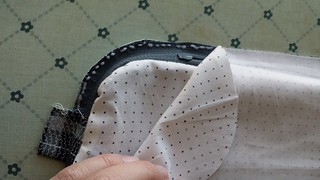
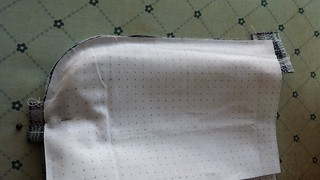
Stitch the layers together using a 1/4" seam. If you've opened your zipper all the way before sewing, you'll need to stop stitching about halfway through, lift your foot, and then slide your zipper closed all the way, then continue stitching until the end.
Remember at the end of the seam to stitch about halfway into the fabric zipper tab, backstitching at the end of the seam.
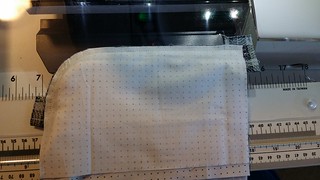
Clip your seam allowance around the curve as with the other side of the pouch, and then turn fabrics right side out and press along the zipper.
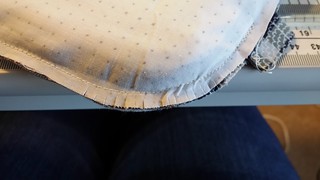
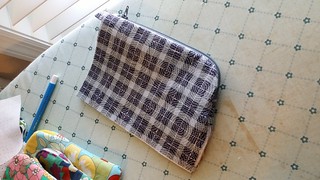
At this point, close your zipper halfway. Flip your fabrics wrong side out again. Line up the two lining pieces right sides together, and then clip or pin together. Mark off a 3-4" section along the bottom of the lining to leave open for turning later.
If you want nice rounded corners on your pouch, follow the next few steps. If you don't mind a more square corner that will bulge out a bit, skip these next few steps and start back up at the *.
At each corner, use your ruler to mark a 1/4" seam at each side.
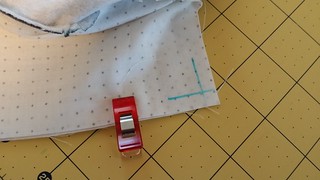
Then, using a small rounded object (a quarter will probably work, I used my tiny rotary cutter), trace a rounded corner.
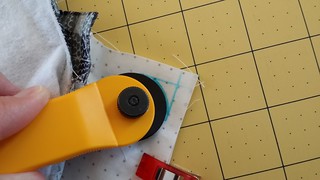
*Starting at the edge of the lining opening on the side of the pouch with the curved zipper, stitch and backstitch a few times, then stitch from that marked lining opening towards the corner, around the rounded corner (if you've chosen rounded corners, otherwise, just turn at the corner), and up the side of the lining toward where the zipper edge is inset.

This is where it gets tricky. You need to get those two lining pieces as flat as possible, and to stitch your lining seam as close to that bunch of fabric as possible. This will be difficult, as there will be a large bunch of fabric and zipper where the curved down edge of the zipper has ended. Just do your best to end your seam there as close as possible. Back stitch a few times at the end of this seam.
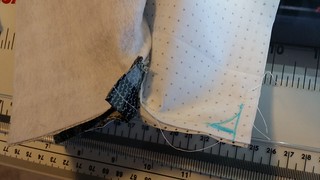
Now, match up your exterior fabric pieces, right sides together, and pin or clip around the entire piece. At the spot where your non-curved zipper end is, make sure all pieces are lined up evenly. Make sure the zipper tab is folded (in a U shape) so that the opening of the U is pointing toward the LINING side. I hope this isn't confusing, I wish I had a picture of this step but forgot to take one. This is so when you turn your pouch right side out at the end, those fabric tabs will be pointing down toward the lining and you'll have a nice flat tab at the edge of your zipper. If you fold the tab the other direction, it will want to point upwards once you turn your pouch right side out and that end of your zipper will be wonky at the side seam and not lie correctly. Just trust me!
At this point, if you want to round your corners, don't forget to mark and trace the rounded corners on the wrong side of your exterior fabric before you start stitching.
Now, starting at the other edge of the lining opening you're leaving for turning, stitch and back stitch a few times, then begin stitching around the other corner of the lining. You'll turn the corner (either rounded or square, depending on your preference), and stitch all the way up the side of the lining to the zipper, across the zipper tab, and then down the side of the exterior fabric, turn the corner, across the bottom of the exterior, turn one last corner, and then up the other side of the exterior fabric, ending again where the curved zipper ends. At this point, you'll want to make sure that the fabric tab at the end of the zipper is pulled out as much as possible (try to make sure the two pieces are lined up with each other), and you'll stitch right up to where the seam at that tab (which was created when you stitched in the zipper) ends.
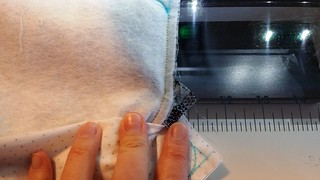
In this picture above you can see the tab sticking out to the right, the seam below that was already there, and the seam coming down from the top (you can see the corner with the blue markings for the corner) is the seam you just sewed, ending with a few backstitches right there in the middle of the tab. You should seamed all around the lining and exterior at this point, with only an opening in the middle of the bottom of the lining.
At this point, your bag is basically done! Turn the bag right side out through the opening you left in the lining, and check to make sure everything looks okay and is even. If it is, turn it wrong side out again, and trim all the corners of your exterior and lining fabric, to reduce bulk after turning.
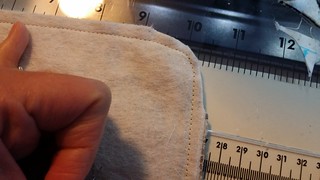
Also trim off the extra fabric that's sticking out from the two zipper tabs, getting as close to the edge of your fabric as possible without cutting any seams.
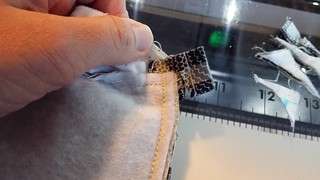
Now, turn your bag through the hole in the lining again, right side out. You'll need to close the hole in your lining. You can either slip stitch by hand, or turn in the seam allowance and machine stitch very close to the end of the fabric, backstitching at the start and stop of your seam.
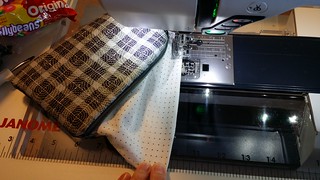
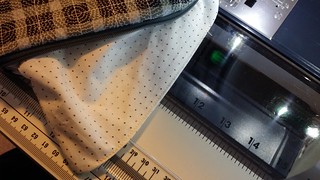
Stuff the lining back into the bag, and voila! Your curved zipper pouch is done!
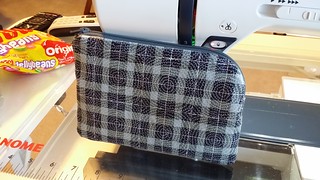
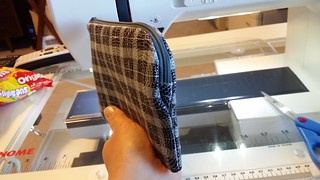
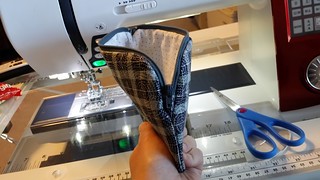

I hope this tutorial has been clear enough! If you have any questions, please feel free to leave a comment or email me (link in the sidebar). If you make a pouch from this tutorial, I'd love to see it! Send me an email, or tag your project with #curvedzipperpouch on Instagram or Flickr.
Thanks for stopping by!

8 comments:
Can't wait to try
Super cute!
This tutorial is absolutely wonderful! Thanks so much for clear instructions.
Did you stitch over the zipper tab when you installed the zipper or just when you sewed into the side seams?
Great tutorial! Thank you ☺
I am wanting to do this but curve over both sides...any hints/tips/tricks/etc??
Thanks for sharing the information. Its too beneficial for me. :-)
odour proof
I love how unique and stylish these curved zipper pouches are.
Post a Comment